There are many questions when future network engineers consider a home lab for: What software should I use? What components will be enough? How can I make sure I get the best equipment for my budget, and ensure I won’t be limited as I advance in my learning?
Whether you are setting up a whole environment while preparing for a CCNA certification or any other purpose, there are many different things you can do in such a hybrid environment.
This article aims at covering these concerns and get you started right away, so when you finish reading this, you know exactly what to do next. You’ll be on your way to learning the Cisco CLI, making your own cabling, routing and switching, and putting it all together to work.
Luckily, there’s no need to reinvent the wheel and do trial and error with devices and configurations, or spend a lot of money on specialized hardware and licenses. If you have been researching about Networking devices and software, you may have encountered expensive and enterprise-grade solutions, that go way beyond what we intend here. To make things easier, we will be listing Hardware equipment that is easier to get, and don’t require Licensing to use.
Let’s get started with our physical equipment. There are physical Firewalls, SOHOs, Hubs, WAPs, Routers and Switches, etc., but we will only need Routers and Switches for now.
The main point of our home lab is to emulate a Network environment, so it makes sense to start with the following recommended list of devices. Then, we’ll lay out a recommended selection of these devices for you to start building your home lab:
- 3 Switches
- 3 Routers
- Cables & Tools
Recommended Selection: Switches
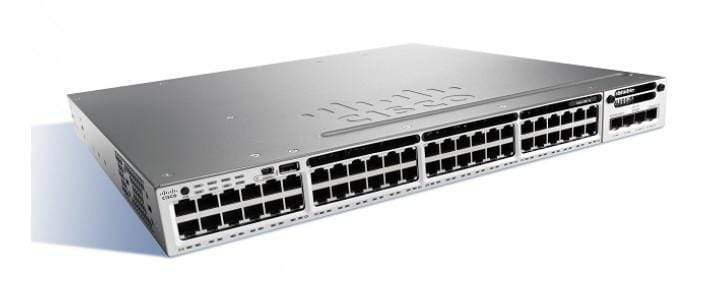
There are many capabilities Cisco switches can offer: Layer 2, Layer 3, Power over Ethernet (PoE), etc. For this specific setup, our go-to should be the Cisco Catalyst 2950 (Layer 2), and the Cisco Catalyst 3550 (Layer 3). These Switches come with many different options, and it may vary on the scalability desired for your home lab, but as a recommendation, we can start with a Switching selection as follows:
Other options include the WS-2950-24 and the WS-2950C-24. The 12 and 24 nomenclatures simply mean the ports included, and the difference between 2950C and 2950 is that the former has fixed 100BASE-FX uplink ports, but fiber is only optional for our purposes.
Other options include the WS-C3550-48-EMI, WS-C3550-24-SMI, WS-C3550-48-SMI. The differences between them are, again, the number of ports (24 and 48), and that EMI supports enhanced routing capabilities (EIGRP, OSPF, etc.). Those are also optional but can help with scalability in the future.
Recommended Selection: Routers
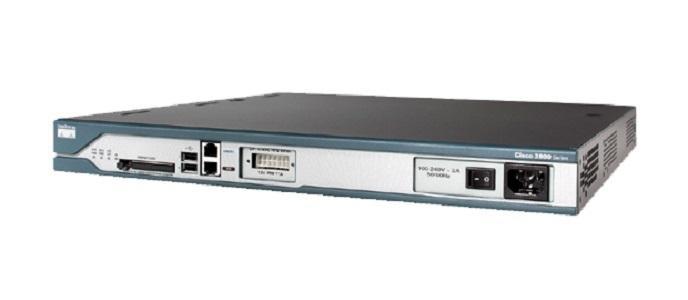
There is also a plethora of Cisco Routers that would fit into our home lab, but we can offer a small number of them and start from there. The point is to know exactly which series and models to look for. This may be your first and most important lesson in your lab work: The hardware selection.
There are the 1800, 2800 and 3800 series in ISR Cisco Routers, and here’s a brief description of them so you know which one to choose:
- Cisco C1861 Routers: Capable for voice, sometimes including FXO and FXS voice ports as well as an 8-port built in switch. If voice capabilities are not within the scope of the lab, a C1841 can do great for our purposes.
- Cisco C2801 Routers: Great for a low to mid-level home labs. If you need more than 4 line cards there are also the C2011, C2821, and C2851 models.
- Cisco C3825 or C3845 Routers: Big and robust, and more than enough for our home lab, but can also work great.
Those models are great to start, and can be upgraded to suit more advanced features, such as Wan Interface Cards (WICs), to support T-1, frame-Relay, DSL or adding more Fast Ethernet interfaces. You can check and compare them here.
For more Voice and Security capabilities, you can check out Cisco’s bundles that specifically address these needs, conveniently called Voice bundles, Security bundles, and VSEC (Voice + Security).
Now that we have selected our devices, we can move on to a couple of peripherals we will need in order to connect them together and have our lab up and running.
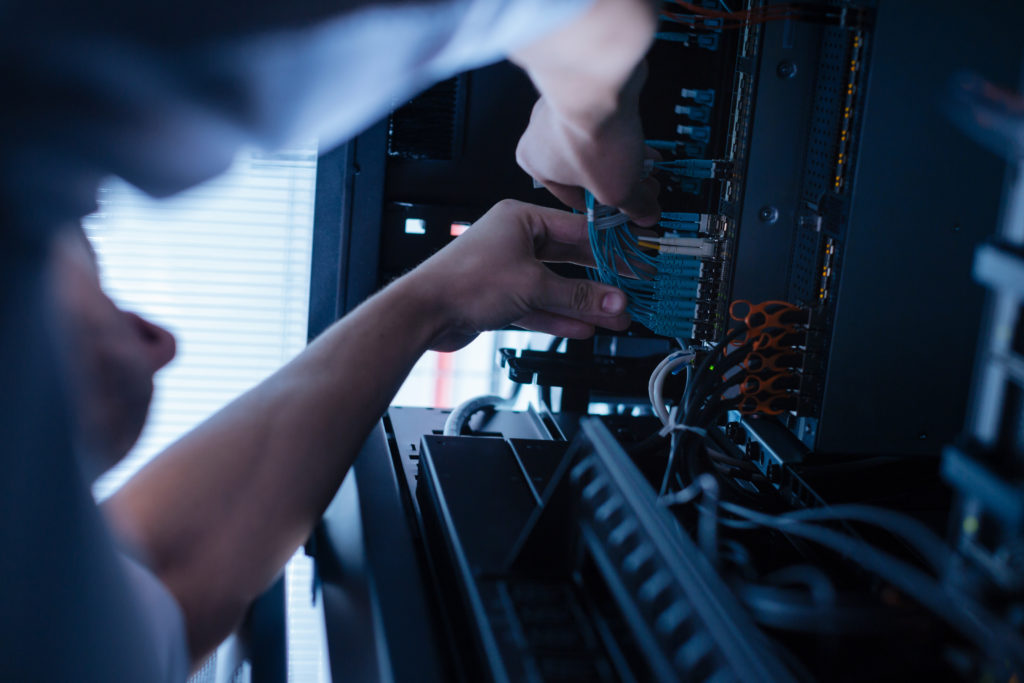
Cables: The Nervous System of Your Home Lab
We can skip Fiber cabling for now. You can set up your home with Cat 5e or Cat 6, UTP cables. Cat 5e will support Gigabit speeds as well as Fast Ethernet, and are cheaper than Cat 6. So as a baseline, consider adding Cat 5a cabling, which will be enough.
Next, we need to consider the 2 types of Ethernet connections: Straight-through and Crossover. If you decide to purchase pre-made cabling, you should consider what type of connections you will be doing, and make a rough calculation based on this. However, this option may render it necessary to buy a lot of cables, and you may miss some foundational knowledge, which is the building of your own cables.
For this last option, we will need one roll of Ethernet cabling. Remember, though, that we have length limits: For each cat 5e and Cat 6 cable, the maximum allowed length is 100 meters or 328 ft, so keep that in mind when designing your home lab.
Now that we have our cabling, let’s move on to the types of connections, and then to the tools needed:
Crossover vs. straight-through connections:

The only physical difference between straight-through and crossover is in the connector’s cabling color order, as we will see in the next section. While crossover cables rearrange the color order, straight through is the same color order in both ends.
Keep the following rule in mind when doing cable work and designing networks such as your home lab:
Cross-over cables are used to connect like-devices (Router to router, switch to switch, etc.), while straight-through are used to connect different kinds of devices (Switch to router, switch to computer).
This information is enough to have a rough estimation of your desired total cabling distance, and the types of connections you’ll need, based on your topology (Check for the bonus section at the end of this article for information on how to layout your lab).
Next step: begin making your own cabling.
For this purpose, you will need:
- Your roll of Cat 5e cable
- An RJ-45 Crimp tool
- RJ-45 connectors
- A Cable tester
Most of the crimp tools have blades and are capable of stripping the cable jackets, but check for these features as you research. Otherwise, you can do it manually with scissors and box cutters (Be careful!).
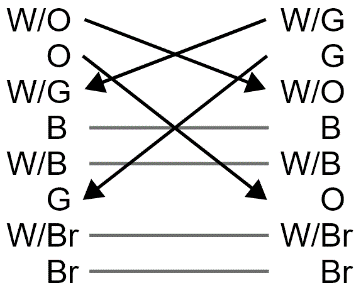
Now we can begin building our own cables as needed. There are 2 standards used for arranging the inner cabling of our new RJ-45 connections
Consider the following as a guideline:
For straight-through, the TIA/EIA 568B standard is commonly used on both ends, and it has the following color order: White/Orange, Orange, White/green, Blue, white/blue, Green, White/brown, Brown.
The TIA/EIA 568A standard has the following order: White/Green, Green, White/Orange, Blue, White/Blue, Orange, White/Brown, Brown, and it is used in combination with the TIA/EIA 568B to build crossover cabling.
That may seem confusing at first, but you don’t need to memorize it. This mnemonic can help for 568B:
“OOG! BBG! 1/3 = 2/6” (Think “ugh! Baby G!”)
To make sense of this, consider the following:
- There are only 4 different colors, and the other 4 cables are the same colors, but with a white stripe.
- Only Even-numbered positions are solid colors. The Odd-numbered have a white.
- Crossovers share the same coloring between both ends at 4th and 5th (Blue, exactly in the middle), and 7th and 8th positions (The last 2 which are brown), so only 4 positions will be switched.
- For crossover, from 568B to 568A, just rearrange the 1st to the 3rd position on the other end, and the 2nd to the 6th position as well.
Our mnemonic makes sense now: OOG BBG are the first 6 colors for 568B (Orange, Green and Blue). You know odd numbers are white striped and also that the last 2 are always brown. “1/3 = 2/6” means couple the 1st to the 3rd in the other end and the 2nd to the 6th as well.
This simple diagram shows how the shifting should be done, for a cross-over cable, from 568B in one end, to 568A on the other end:
You now know how to build your own cables, which ones to use and for what type of connection. You may have seen that some Cisco Routers and Switches have the ability to auto-sense the cable configuration being used and change the electrical-signaling to match the connection. However, the devices mentioned in this article do not auto-sense, so this lab will need your new knowledge to practice (Remember to make use of your cable tester).
Additional cabling:
Every Cisco router or switch has its console cable included, which is a RJ-45 with a rollover configuration to DB-9 Female or USB on the other end. Take this into account because odds are, your computer will only have USB ports and you may need a Male serial adapter to USB, in case you weren’t supplied with a RJ-45 to USB cable.
Now that you have all connected, you can make use of an enormously useful free software called Putty to connect to your devices and begin configuring them. This lightweight software will be your swiss knife for decades in your IT career since it is capable also for SSH connections and a lot more! Also, make sure the correct drivers were installed in the computer you will use to configure your new devices.
About pre-made lab kits:
There are pre-made lab kits specifically chosen for CCENT, CCNA and CCNP students, and include pretty much all you need for this, but they can cost way more than getting each device individually.
Also, consider in the future acquiring virtual lab platforms such as GNS3 and Cisco VIRL to integrate a more robust lab.
Bonus #1:
While you research for local stores or online for these physical devices, you can start designing a virtual network in your own computer today, by using a popular training tool provided by Cisco called Packet Tracer. You can get it in the Cisco website after you set up an account, and you begin designing network labs as complex as you want. It is interactive and you can also use the Cisco CLI as well as cmd inside it to configure your network.
Try this next: Start designing your home lab in Packet Tracer, and save your projects as blueprints for your physical lab!
Bonus #2:
You can also install Type-2 (Or “hosted”) virtualization software, to experiment with different Operating Systems. For our purposes, you can start configuring virtual Firewalls, VPN servers, or if you haven’t already, learning Linux/Unix inside your own computer. It may have its own learning curve since it will need you to know when to use NAT or Bridged connections, or do some extra configurations in some cases, but it will be a part of your home lab!
If you have a powerful computer to experiment with, you can also research about Type-1 (Or “Bare-metal”) virtualization, since a lot of enterprises have moved from physical servers to “Bare-metal” virtualization for different solutions.
That’s enough material to get you started building a successful, 100% practical testing lab. Whenever you need more guidance, NexGenT is here to help you launch a career in IT through specialized training!
Bonus #3: Putting It All to Work
Just as important as your technical skills, so will be your knowledge of the IT industry: what to expect, which skills are the most relevant, etc., to begin building a successful strategy for your career in IT at the same time you set up your home lab.
0 Comments